
Firmware Emulation 102
Emulating the Firmware Image
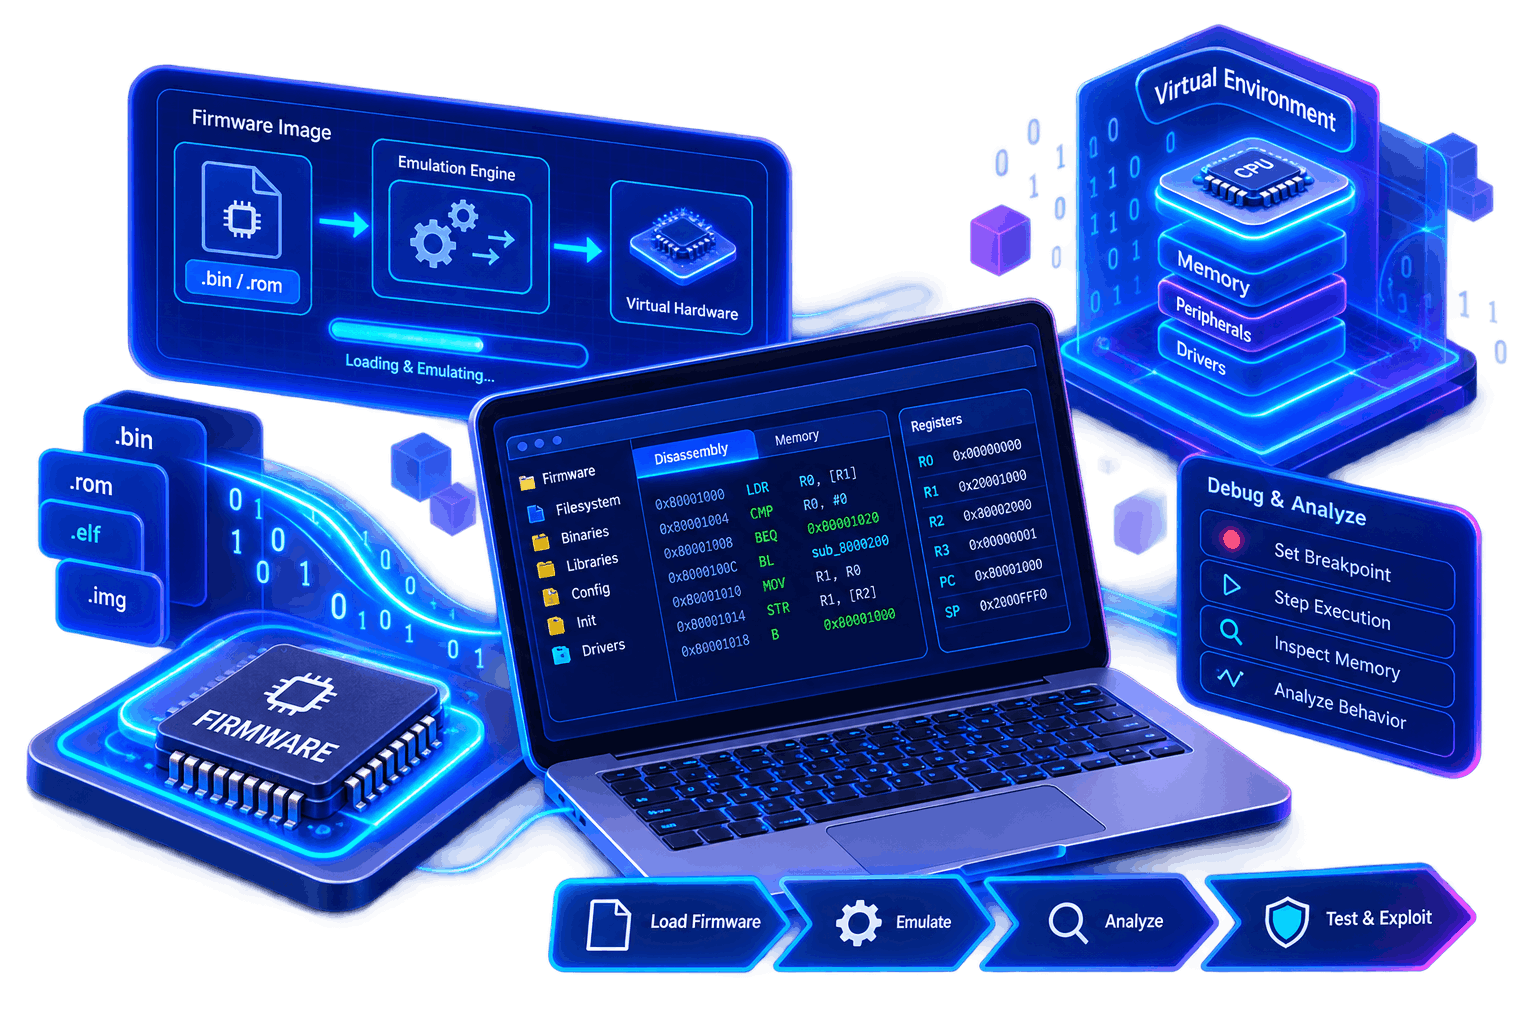
Emulating the Firmware Image
Now that you've got a clear idea of what firmware emulation is and why it matters, it's time to actually dive in. In this blog, we'll walk through setting up the tools and running your first emulation session. We'll be using Firmware Analysis Toolkit (FAT) and Firmadyne, two of the most popular tools for analyzing and emulating router firmware. If your environment and firmware file are ready, let's get to it.
Once everything's set, run the following command to start emulating your firmware image:
sudo ./fat.py WNAP320\ Firmware\ Version\ 2.0.3.zipEmulating Firmware with Firmadyne
Firmadyne is another super handy tool when it comes to firmware emulation. It's designed to automatically extract, set up, and emulate firmware in a controlled environment. The great thing about Firmadyne is that it makes analyzing firmware behavior much smoother and gives you the flexibility to poke around, spot vulnerabilities, and see how things work under the hood.
Tools You'll Need
Before getting started, make sure you've got these ready:
- Ubuntu (18 or 22): Just like FAT, Firmadyne works best on a Linux-based system like Ubuntu.
- Firmadyne: Download it from the official GitHub repo. It's the main tool we'll be using for this part.
- Firmware Image: Grab the firmware you want to emulate — in this case, the NETGEAR WNAP320 firmware.
Setting Things Up
Alright, before you can start emulating firmware with Firmadyne, you'll need to get a few things sorted. Here's a simple step-by-step to get everything in place:
-
Install the Required Packages
Firmadyne relies on several tools and dependencies. Run this command to install everything in one go:
sudo apt install busybox-static fakeroot git dmsetup kpartx netcat-openbsd nmap \ python3-psycopg2 snmp uml-utilities util-linux vlan python3-pip python3-magic -
Make Python 3 the Default
Some systems still ship with Python 2 as default. If that's the case for you, switch it to Python 3:
sudo update-alternatives --install /usr/bin/python python /usr/bin/python3 10 -
Clone the Firmadyne Repository
Now, grab the Firmadyne source code from GitHub:
git clone --recursive https://github.com/firmadyne/firmadyne.git -
Clone Binwalk
Binwalk is essential for unpacking firmware images:
git clone https://github.com/ReFirmLabs/binwalk.git -
Install Binwalk Dependencies
Navigate to the Binwalk folder and install its dependencies:
cd binwalk sudo ./deps.sh sudo python ./setup.py install -
Install and Set Up PostgreSQL
Firmadyne uses PostgreSQL to manage firmware data. Install it and set up the database like this:
sudo apt install postgresql sudo -u postgres createuser -P firmadyne # (Enter a password for the 'firmadyne' user) sudo -u postgres createdb -O firmadyne firmware sudo -u postgres psql -d firmware < ./firmadyne/database/schema -
Fetch Additional Firmadyne Resources
Download extra required resources for Firmadyne to work properly:
cd firmadyne ./download.sh -
Install QEMU
Finally, install QEMU along with the necessary architecture support:
sudo apt install qemu-system-arm qemu-system-mips qemu-system-x86 qemu-utils -
Edit Firmadyne Configuration
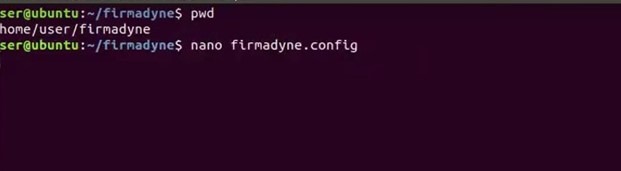
Fig 2: Editing Firmadyne Configuration file 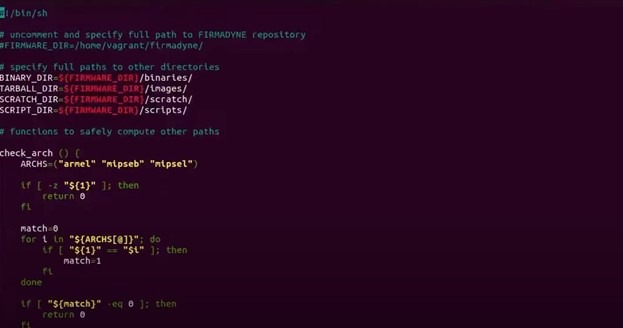
Fig 3: Editing Configuration Paths in Firmadyne Script 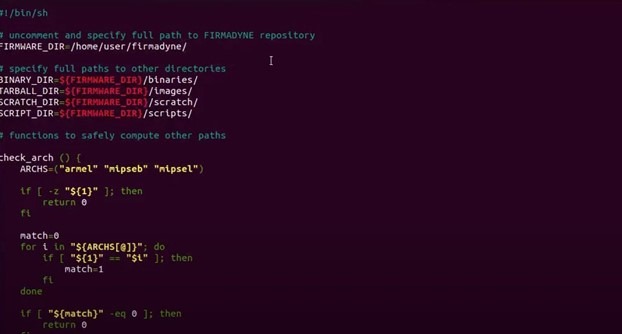
Fig 4: Configuration path has been updated to /home/user/firmadyne -
Extracting the Firmware
Firmadyne comes with a tool specifically for extracting firmware images. To extract the NETGEAR firmware, run the following command on your router's binary file:
python3 ./sources/extractor/extractor.py -b Netgear -sql 127.0.0.1 -np --nk "$ZIP_FILE" imagesThis will unpack the firmware image and place the extracted files into the images directory, getting it ready for emulation.
Once the extraction process is done, you'll need to make sure it completed successfully. To check, just list the contents of the images directory:
ls imagesIf everything worked, you should see your extracted firmware files sitting there.
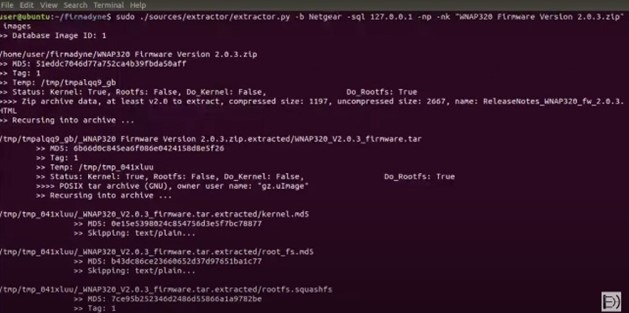
Fig 5: Extracting the Netgear WNAP320 firmware -
Get the Firmware Architecture
You'll need to figure out the architecture of your firmware before emulating it. Run this command to let Firmadyne detect it:
./scripts/getArch.sh ./images/1.tar.gzThis will output the architecture type (like ARM, MIPS, etc.) for your firmware.
-
Upload the Firmware to the Database
Next up, you'll need to push your extracted firmware data into the Firmadyne database. Do it like this:
./scripts/tar2db.py -i 1 -f ./images/1.tar.gzThis step registers your firmware image with Firmadyne's backend so it can be used for emulation.
-
Create the Emulation Image
Finally, it's time to build the actual emulation image. Run:
sudo ./scripts/makeImage.sh 1This prepares everything needed for the firmware to boot up inside an emulated environment.
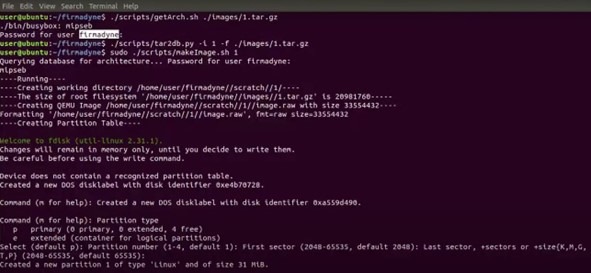
Fig 6: Creating and formatting a image from extracted firmware -
Infer the Network Configuration
Once the emulation image is ready, you'll need to figure out the network settings it uses. Even though the output might look a little messy, this command will pull out the essential network configuration details:
./scripts/inferNetwork.sh 1
Fig 7: Infers the network interface and IP address (192.168.0.100) And there it is — you'll get the emulated device's IP address right here!
-
List Emulated Files
Before kicking things off, it's a good idea to check the files in the scratch directory where your emulated environment is set up. Run:
ls scratch/1/Make sure everything's in place.
-
Run the Emulation
Alright, time for the main event. Fire up the emulation with:
./scratch/1/run.shAnd just like that, your NETGEAR WNAP320 firmware is running in an emulated environment!

Fig 8: Running the firmware in an emulated environment 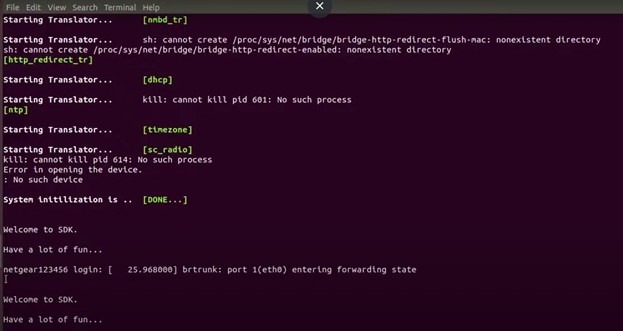
Fig 9: Firmware has been emulated 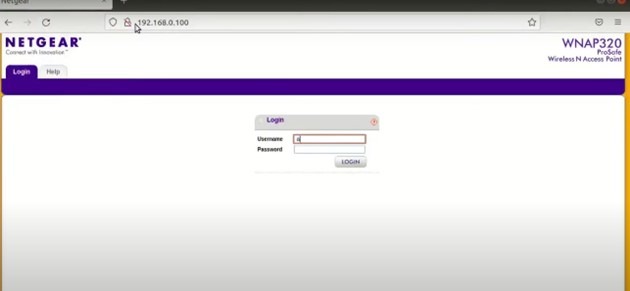
Fig 10: Netgear WNAP320 ProSafe Access Point login page at 192.168.0.100
Login Credentials
Finally — emulation is done! Once your emulation is running smoothly, you can go ahead and set up a proxy on Firefox and start intercepting the network traffic with Burp Suite. This lets you analyze how the device communicates, spot potential vulnerabilities, and play around with requests without touching the actual hardware.
Fig 11: Intercepting traffic on Burp Suite
And there you go — you've just emulated firmware using Firmadyne. From setting up the environment, extracting the firmware, to running it in a controlled setup, it's a solid way to safely test and explore how devices behave. Once you've got it running, you can hook up tools like Burp Suite to intercept and inspect traffic, spotting anything unusual. Firmware emulation isn't as complicated as it sounds once you get the hang of it. Keep experimenting, and you'll keep finding new things to break (and fix).
Learn in proficient way to stay secured
Gain practical cybersecurity skills through expert-led training, real-world projects, and hands-on learning designed to prepare you for today's security challenges.


Address:
601, park plaza business center, S No. 296/2, Porwal Rd, Lohegaon, Pune, Maharashtra 411047
Phone: 91 8454095561
Email: [email protected]
GET IN TOUCH:
©Copyright 2024 Unoacademy Labs LLP