
UART 103
Device Communication and Shell Access
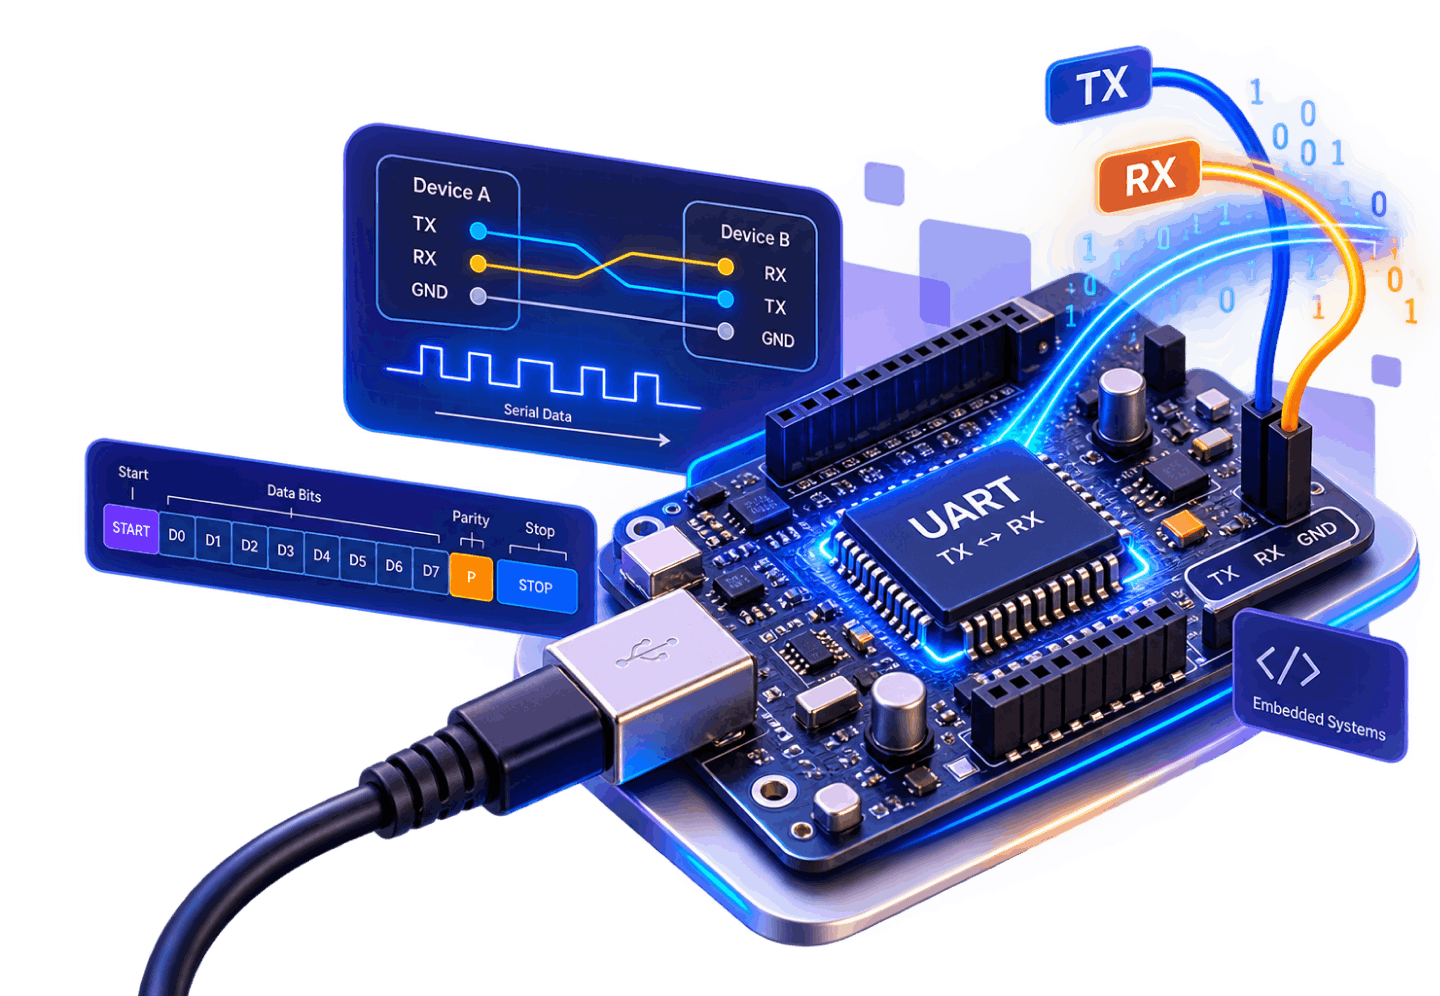
UART 103: Device Communication and Shell Access
Objective
In this blog, our objective is to gain shell access to the target device via the UART interface. Once a successful connection is established, we'll explore the device's file system with the aim of locating stored credentials or configuration data. This process is a vital step in hardware analysis, as it can reveal sensitive information or help us better understand how the device operates internally.
Description
Identifying UART pins on a PCB might sound intimidating at first, but it's actually pretty approachable once you know what to look for. One of the most reliable ways to do this is by using a Digital Multimeter (DMM). By measuring voltage levels and checking connectivity at various pinouts on a board, you can usually spot the UART interface.
Steps
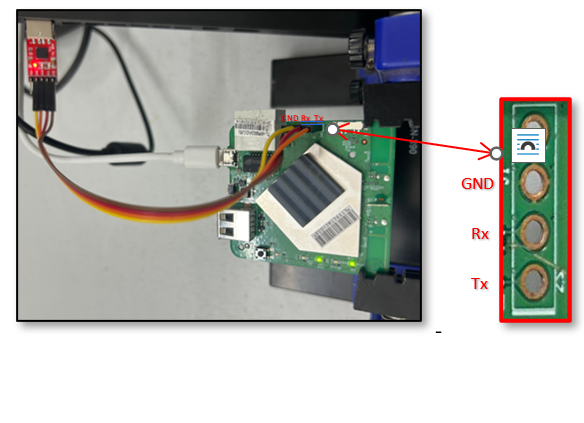
1. Connecting UART Pinouts to USB-to-TTL Converter
- Use jumper wires or breakaway headers to link the USB-to-TTL adapter to the UART pins on the router's PCB.
- If required, solder the wires or headers to ensure a stable connection.
- Connect the Tx pin of the USB-to-TTL converter to the Rx pin on the router.
- Connect the Rx pin of the USB-to-TTL converter to the Tx pin on the router.
- Connect the GND of the USB-to-TTL converter to the GND pin on the router.
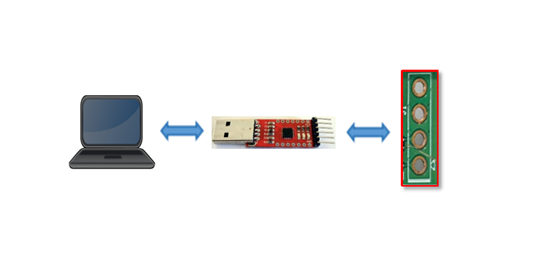
2. Shell Access
- After establishing the physical UART connections, plug the USB-TTL converter into your laptop's USB port.
- Identify the connected serial interface, typically available at /dev/ttyUSB0.
- Power on the device and immediately launch a serial console utility to catch the boot process.
- Common utilities for serial console access include:
- picocom
- screen
- Use the following command to initiate a session with picocom:
sudo picocom -b <baudrate> -D <device>Replace <baudrate> (e.g., 115200) and <device> (e.g., /dev/ttyUSB0) accordingly.
3. Baudrate Identification
- Most devices use a default baudrate of 115200, but this can vary.
- If you see unreadable or "garbage" data in the terminal, it's likely that the baudrate is incorrect.

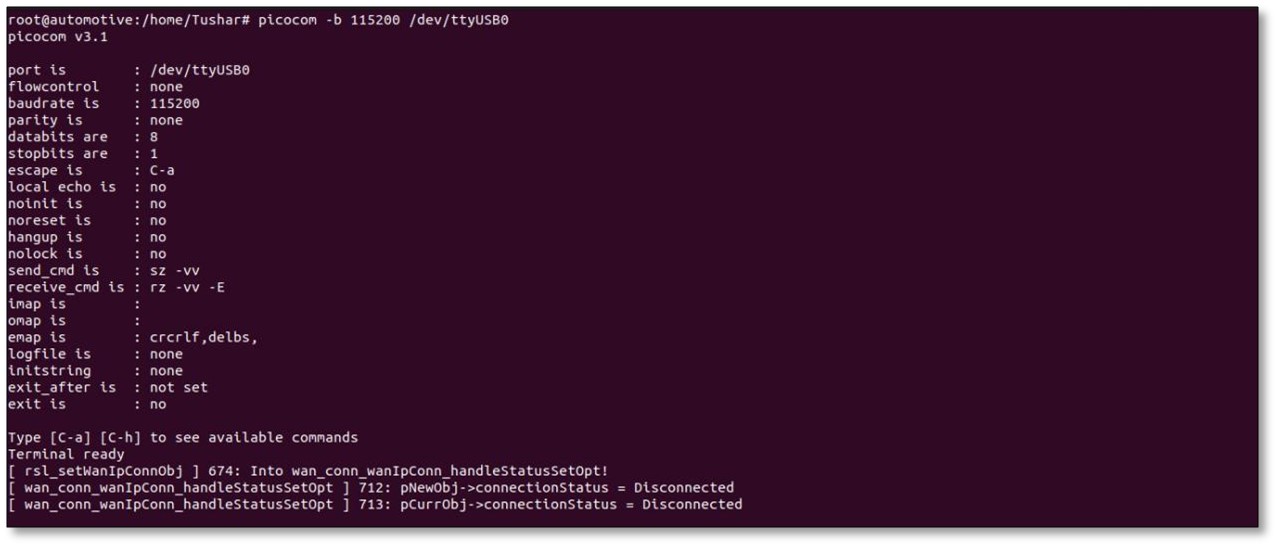
- Once you observe system logs or boot messages, and the terminal responds to commands like
ls, it confirms that shell access has been successfully established — assuming your wiring is correct. - You can now begin exploring the file system and look for valuable data such as stored credentials.
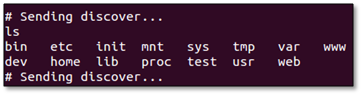
4. Note on "Sending Discover" Messages
- If the terminal becomes cluttered with repetitive messages like "sending discover", these are typically generated by background services (e.g., DHCP clients).
- While they don't prevent shell access, they can be distracting.
- You may choose to terminate or kill the related processes to maintain a clean working shell.
System Access Achieved
Gaining shell access through UART provides a powerful entry point into the inner workings of embedded devices. From observing boot logs to navigating the file system, this method offers valuable insights and potential access to critical data such as stored credentials. While UART doesn't always guarantee root access, it serves as a solid foundation for further analysis and exploitation.
Learn in proficient way to stay secured
Gain practical cybersecurity skills through expert-led training, real-world projects, and hands-on learning designed to prepare you for today's security challenges.


Address:
601, park plaza business center, S No. 296/2, Porwal Rd, Lohegaon, Pune, Maharashtra 411047
Phone: 91 8454095561
Email: [email protected]
GET IN TOUCH:
©Copyright 2024 Unoacademy Labs LLP